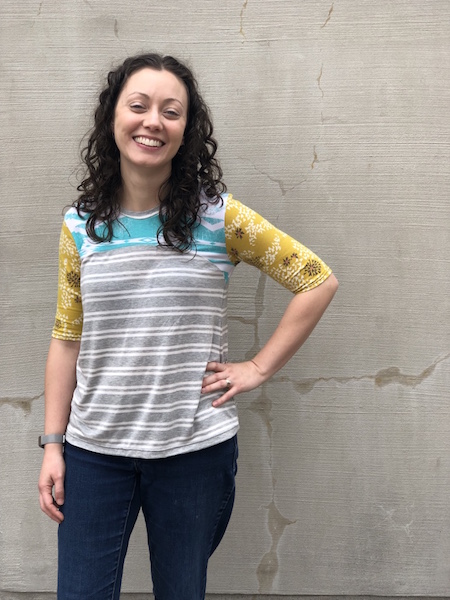
Hello! I had lots of fun recreating this color blocked tee, inspired by a photo on Pinterest. For my version I used the Women’s Discoverer Tee pattern from Ellie and Mac.
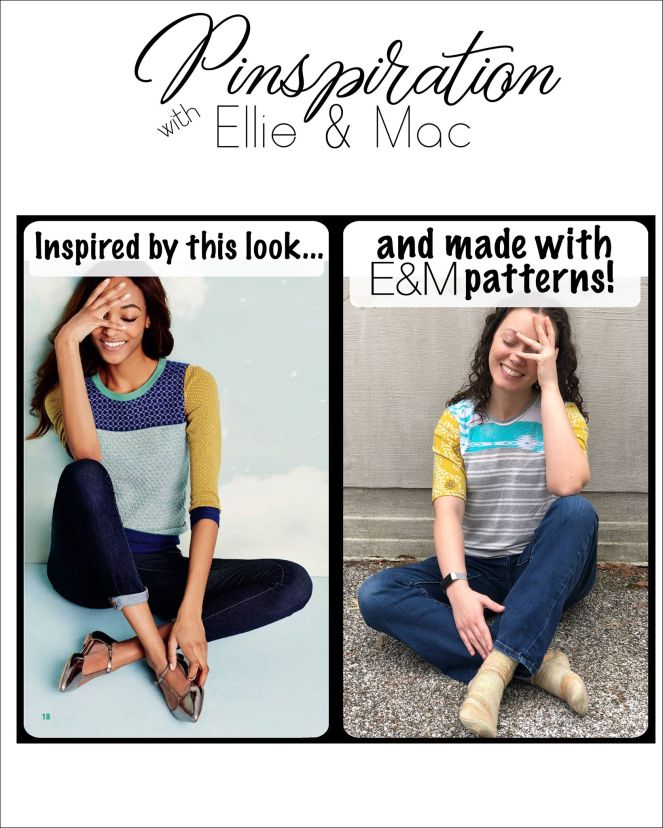
The version that I made was loosely inspired by the photo (mustard toned sleeves, a grey bodice and blue/turquoise yoke). One area that was a creative push for me with this project was using three different prints in one top. I typically will match a print with a solid (but not necessarily span multiple prints into one top).

To share more details about this project, I’ll share via a Pattern Review:
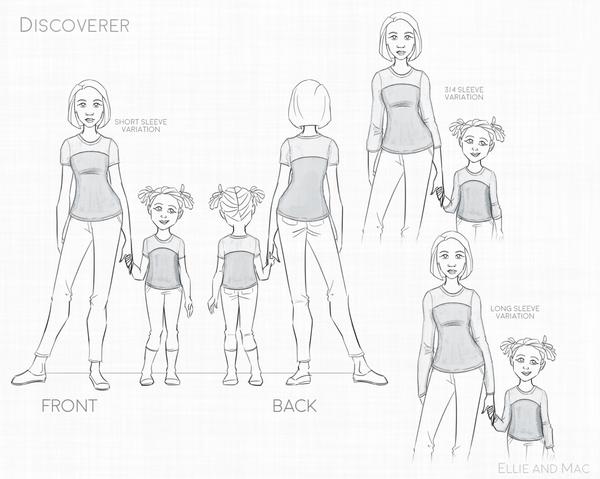
Pattern Description: The Discoverer Women’s Tee Pattern is so flattering on all body shapes. It features trendy color block style, arched bodices, and three sleeve length options. This top is on trend and perfect for any occasion. Throw on some leggings or jeans and a great pair or boots or sneakers and you are photo ready!! This pattern is sure to be a new favorite in your wardrobe.
- Arched Bodices
- Short, 3/4 and long sleeve options
Pattern Sizing:
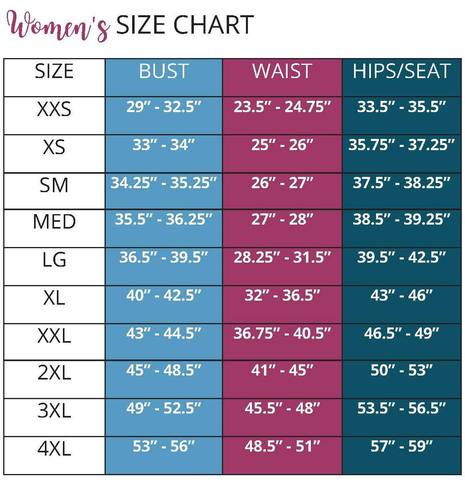
I graded across a S/M/L for the Top/Waist/Hips and sewed a Small for the sleeves. The sleeves ran tighter on me but I like the contrast of fitted sleeves with a looser/flowy bodice.
Did it look like the photo/drawing when you finished sewing? Yes
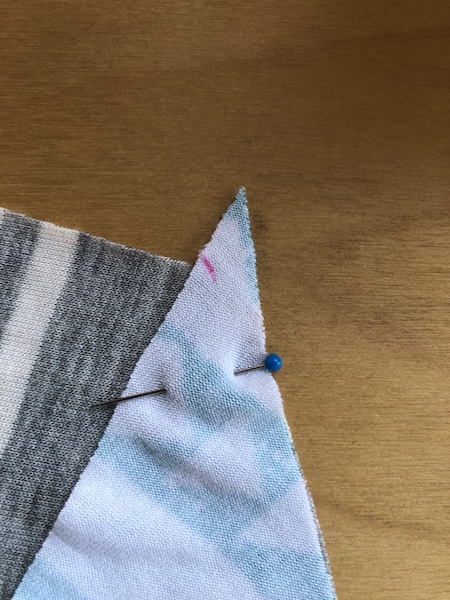
Were the instructions complete and easy to follow? Yes. There is one detail that I’d like to add. The curved yoke edges can be a little tricky to sew (especially with slippery fabrics like a rayon knit). The directions recommend to mark the center of the yoke and bodice pieces (to align the centers together). One additional step that I took was to mark the 1/4″ seam allowance on each of the edges of the top and back yokes. By pre-marking this area, it helped me with the alignment of the ends. The pattern piece ends are at a point (which go past the seam allowance, into the side seams).

Fabric used (did you use the suggested fabrics in the pattern)?
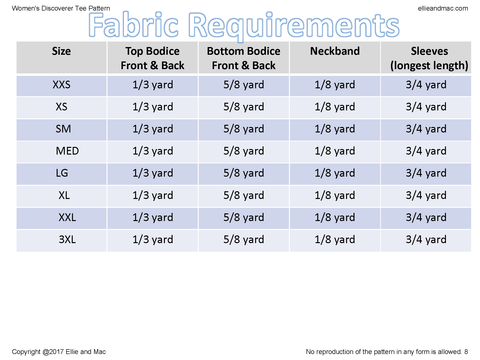
Pattern Recommended Fabric: This top is designed to be made using knit fabrics such as sweater knit, cotton lycra, double brushed poly, stretch velvet, french terry and more.
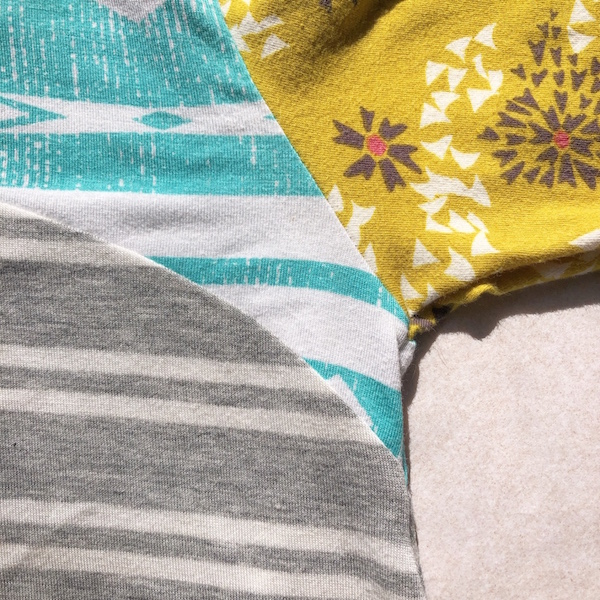
Yes. Although a recommended percentage of stretch isn’t mentioned in the instructions, I used two 50% stretch, rayon knits for the body and a cotton lycra jersey knit for the sleeves. I enjoyed this project to use smaller scraps of fabrics from my stash. I decided to pair two rayon knits together for the body. I knew the rayons had the same amount of drape and the stretch and would work well together.
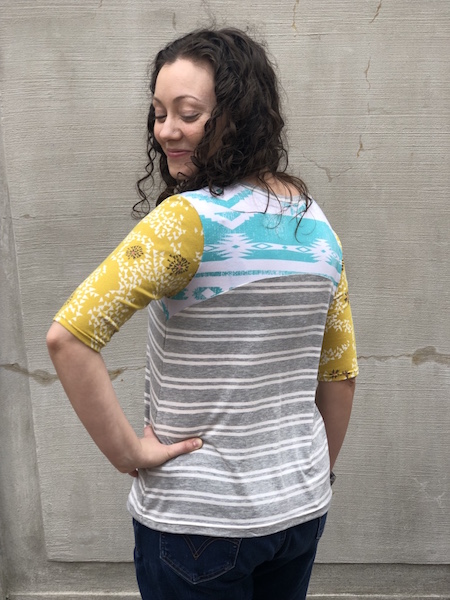
The two rayon knits were lovely prints from Simply by Ti fabrics.** For the bodices, I used a soft, heather gray/ivory rayon fabric.
For the yokes, I used a fun Turquoise Ivory Aztec Geometric print. I’m so happy that I paired these two prints for this top. Their softness and drape go so well together.
I’ll share more about the Cotton Lycra fabric that I used for the sleeves in the Would you Recommend… section below.
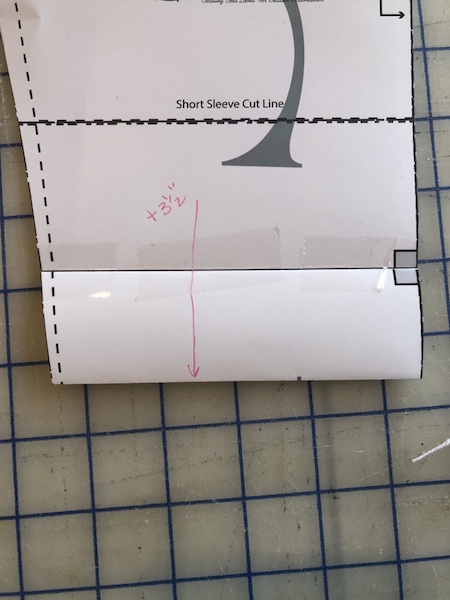
Did you alter the pattern in any way? Yes. I modified the sleeve pattern and made a half sleeve version (the pattern includes short sleeve, 3/4 and long sleeve options). I made this alteration to closer match the inspired photo (and I also enjoy wearing this sleeve length in the spring and fall). At the short sleeve length I added 3 1/2″ to make this elbow/half sleeve version.
I also chose to self-draft the neckband (rather then following the suggested neckband pattern piece). I measured the neckline (after sewing the shoulder seams) and used an 80% neckband circumference with the grey/ivory rayon knit fabric.
I measured 24″ for the neckline (on my actual top). I added a 1/2″ for the seam allowance (24.5″). Multiplying 24.5″ by 0.8 = 19.6″. I divided this number by two (as the neckband is cut on the fold) and got 9.8″ for the new neckband pattern piece.
Was there anything you disliked or would change? No. I really liked the bodice length and was happy with the finished top.
Would you sew it again? Yes! I would enjoy making this top again in alternate sleeve lengths (and a monochromatic version with a knit piping in between the seams may be on my future make list).
Would you recommend it to others? Yes! This was a fun project to use smaller fabric scraps with. I’ve been inspired this year to look more at creative ways to use fabric scraps and this was a fun one to make.
For the sleeve fabric, I repurposed a handmade cardigan that I wasn’t wearing. I found that the sleeve pattern piece for the Discoverer tee was smaller then the cardigan that I had (so I could lay the sleeve pieces on top of the cardigan sleeves and cut out the Discoverer tee).
Do you consider the pattern beginner/intermediate/advanced? I would say more Advanced Beginner (depending on fabrics that are selected). Rayon knits were a little more challenging to sew together on the curve, but would definitely be doable for someone comfortable with sewing knits.
Does the pattern include layers for easy printing? Yes
Seam allowances used in the pattern: 1/4″
Is the pattern cut or no cut pages? No cut
I used my Janome AirThread 2000D for this project and loved working with it. This machine makes the start of the seams so easy! A previous serger that I owned really struggled with the beginning of seams with rayon knit fabrics (and would typically need help by adding a tear away stabilizer to start the seam). This is a faster machine as well then a standard sewing machine (so it does quite literally make the project go faster).
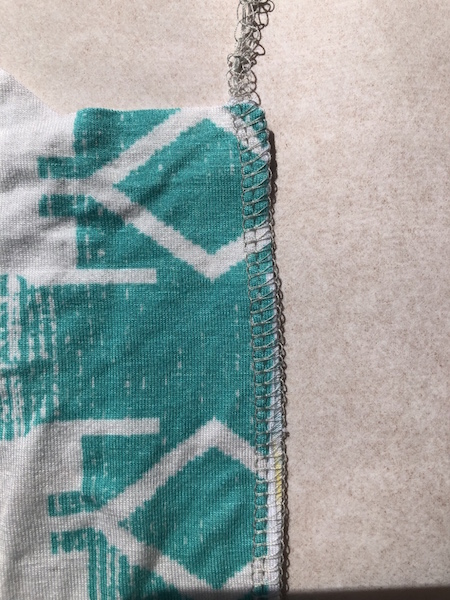
I did have an issue come up (that was user error) that I thought I’d share about. After I sewed the seams in the top, I noted a couple of places in where the machine skipped stitches with the left serger needle. I found that I selected an 80/12 Universal sewing machine needle to sew in the serger. I should have selected a Ballpoint or Jersey sewing machine needle for this project rather then a Universal needle (as all of the fabrics in the is project are knits). Simply by Ti has a handy needle table on their site that I’ve enjoyed referencing as well. Note to self: next time double check the sewing machine needle base before putting it in the machine.
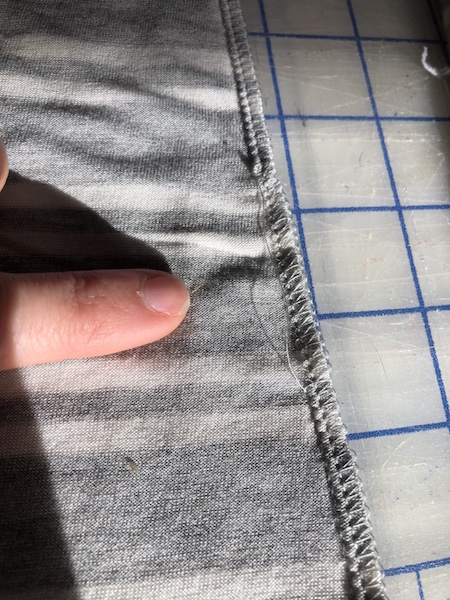
I really enjoyed this project! I look forward to getting lots of wear from it through the spring, summer and fall. For the sleeve and top hems, I used a Janome CoverPro 900 CPX coverstitch machine.

**I am a Simply by Ti Ambassador and received the rayon knit fabrics mentioned in this post as complimentary fabric in exchange for review and promotion. The fabric selected was my choice and the views expressed are my own.
