Hello there! I’m very excited to share about making my own pair of leather sandals! I had never made a pair of outdoor shoes before so I was very excited to make these. I followed the pattern, THE ARTIST SERIES Espadrilles kit: -Shoe Making D.I.Y. inspired by Leather Espadrilles from Halfmoon Atelier (available as a kit through AHAPPYSTITCH on Etsy).

This kit came as a collaboration from A HAPPY STITCH on Etsy. The Leather Sandal pattern was written by Halfmoon Atelier. The pattern and supplies came together as a kit, including the espadrilles supplies. The kit isn’t currently available (but if you send a PM to Melissa of A HAPPY STITCH, she may make the kits available again for purchase in her shop).

Pattern Description: N/A

Pattern Sizing: Foot length – 8 1/8″ to 10″
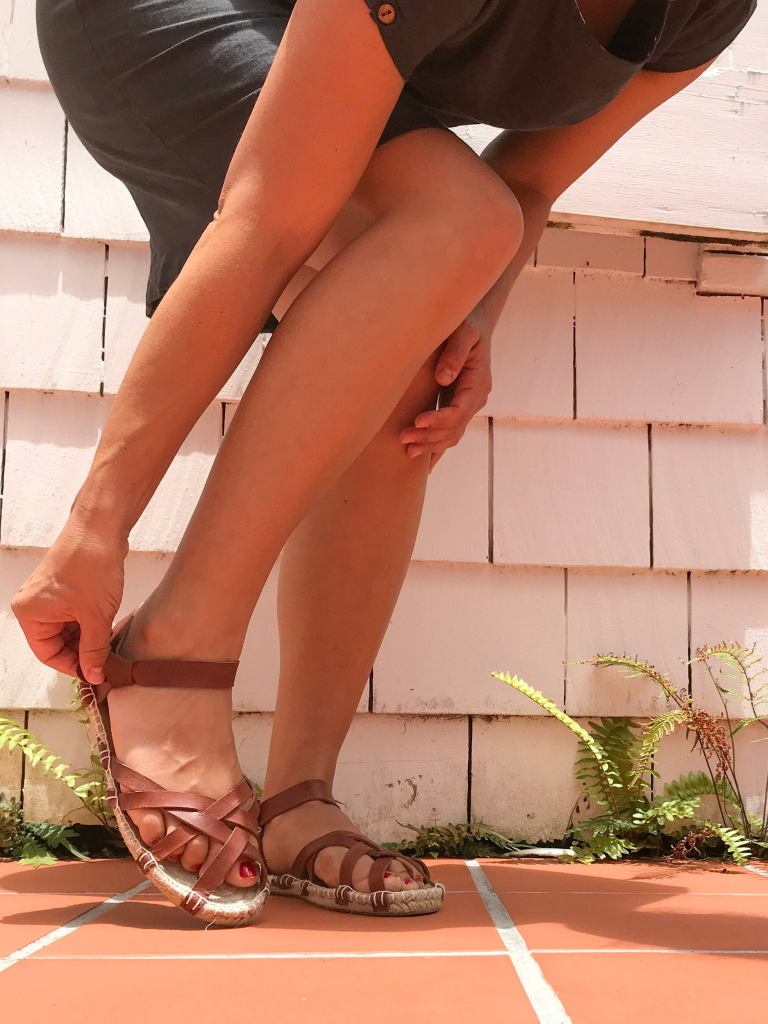
Did it look like the photo/drawing when you finished sewing? Yes!! I was so excited for this.

We’re the instructions complete and easy to follow? Yes, the instructions were very helpful.

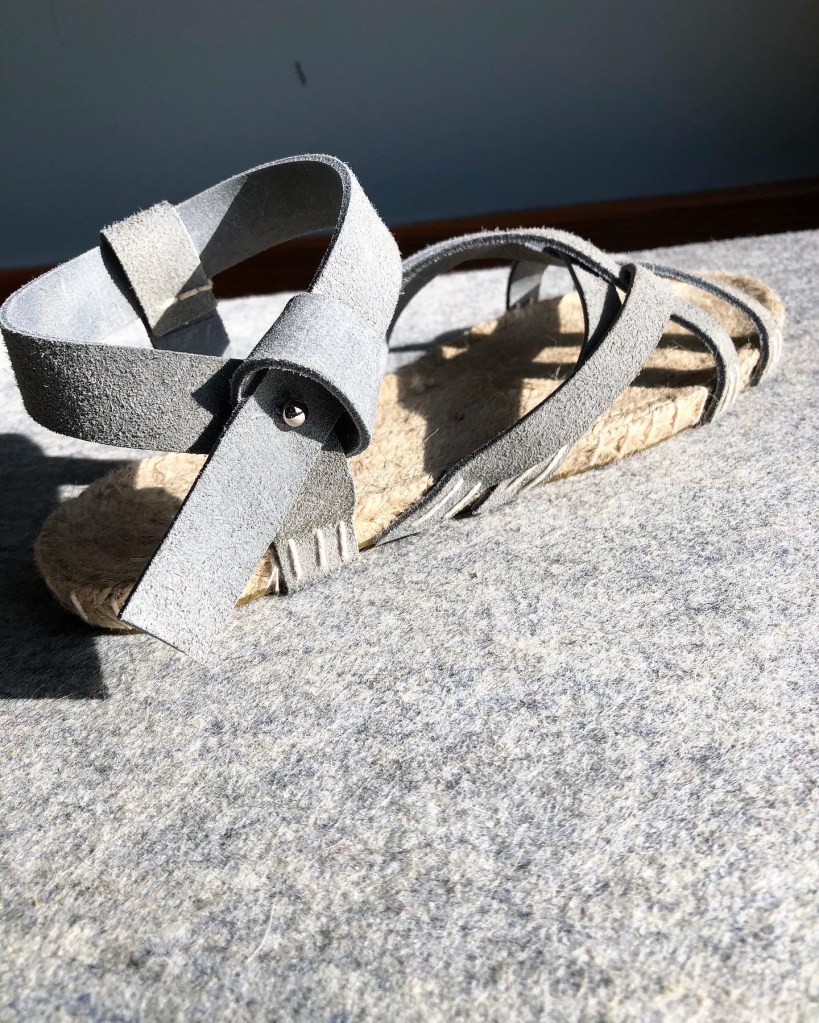
Fabric used (did you use the suggested fabrics in the pattern)? Leather/suede. The pattern recommends leather that is 4 oz – 5oz (1.6mm – 2mm) thick. I purchased my suede through a small leather shop that sells off their remnants at a deep discount.

Did you alter the pattern in any way? Slightly. For the first sandal I followed the stitch hole spacing as suggested in the pattern. For the second sandal I adjusted the stitch holes to match the shoe.

For the stud buttons, I found the leather that I purchased was slightly too thick for the stud buttons that I purchased. The post within the stud was too short. I was not able to twist the back of the stud onto the post with the threaded closure. The buttons that I purchased were from Amazon and were Silver, 9 x 8mm. The grey suede/leather that I purchased is 3mm thick (admittedly thicker then the pattern recommends). For the sandal strap, two pieces of leather are placed on top of each other (for a total thickness of 6mm). I received some great tips from the designer for how to modify the leather to fit stud buttons.

On a piece of scrap suede, I tested first cutting a punched hole as recommended in the pattern.


Then I used an Exacto knife to shave off a bit from the back of the leather around the hole. It helped for me to pinch the suede and then shave off pieces of the suede while holding the strap folded.

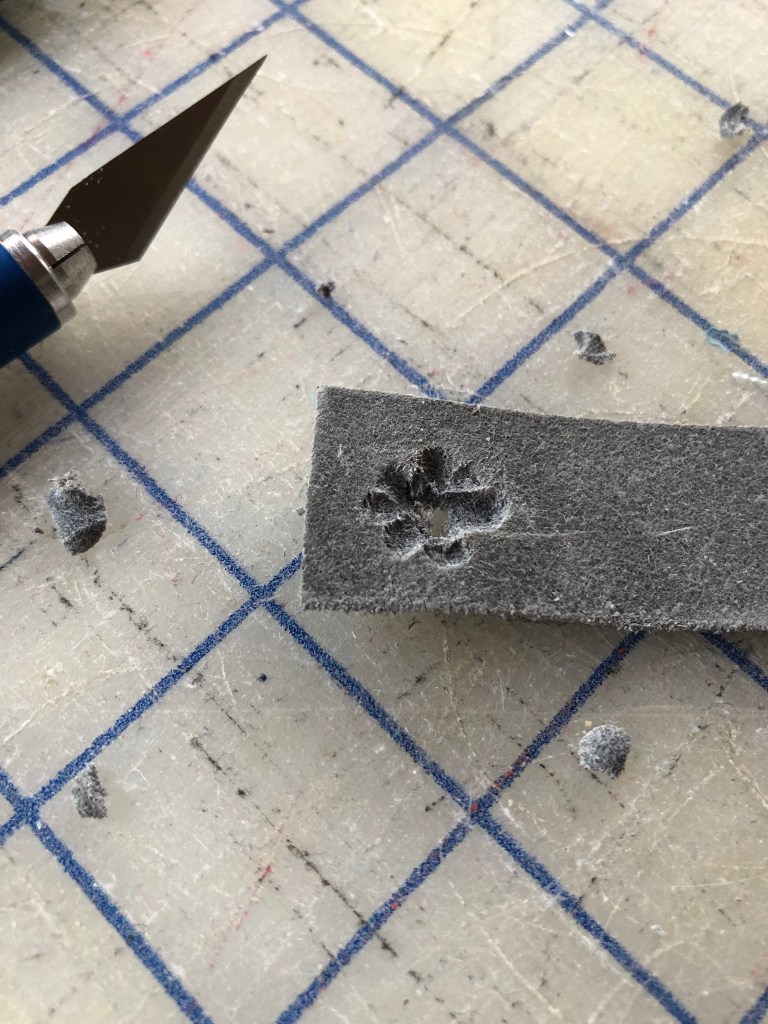
Shaving off a bit around the hole allowed more clearance. More threads became engaged on the back of the button closure to secure the button stud in place.
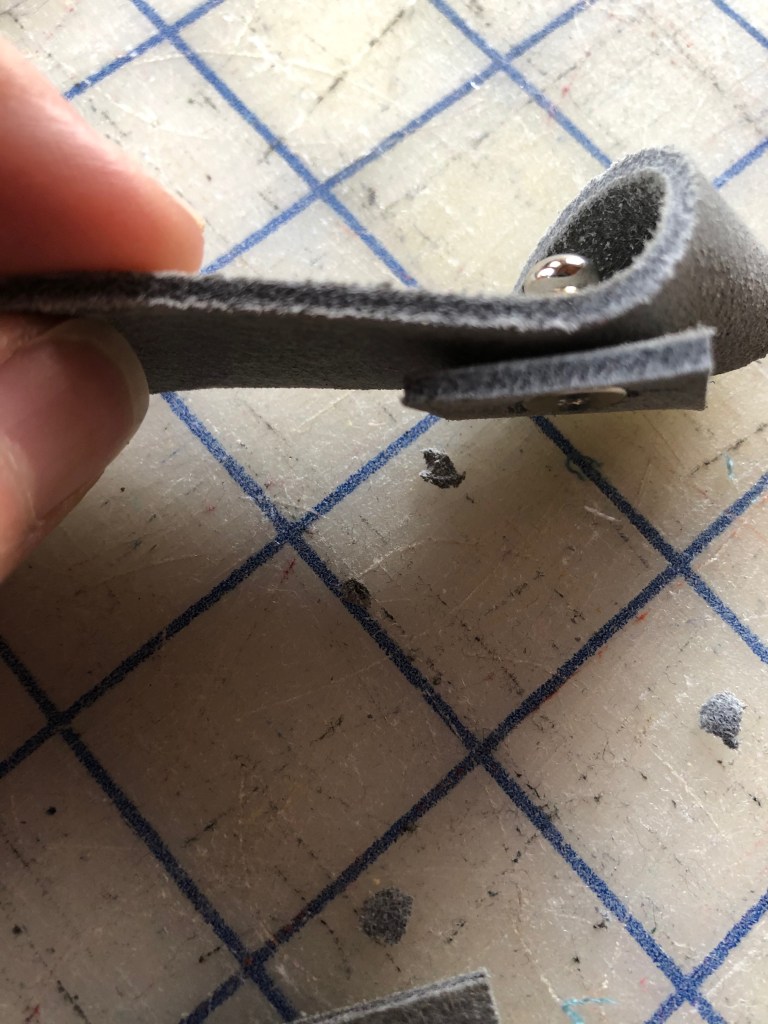
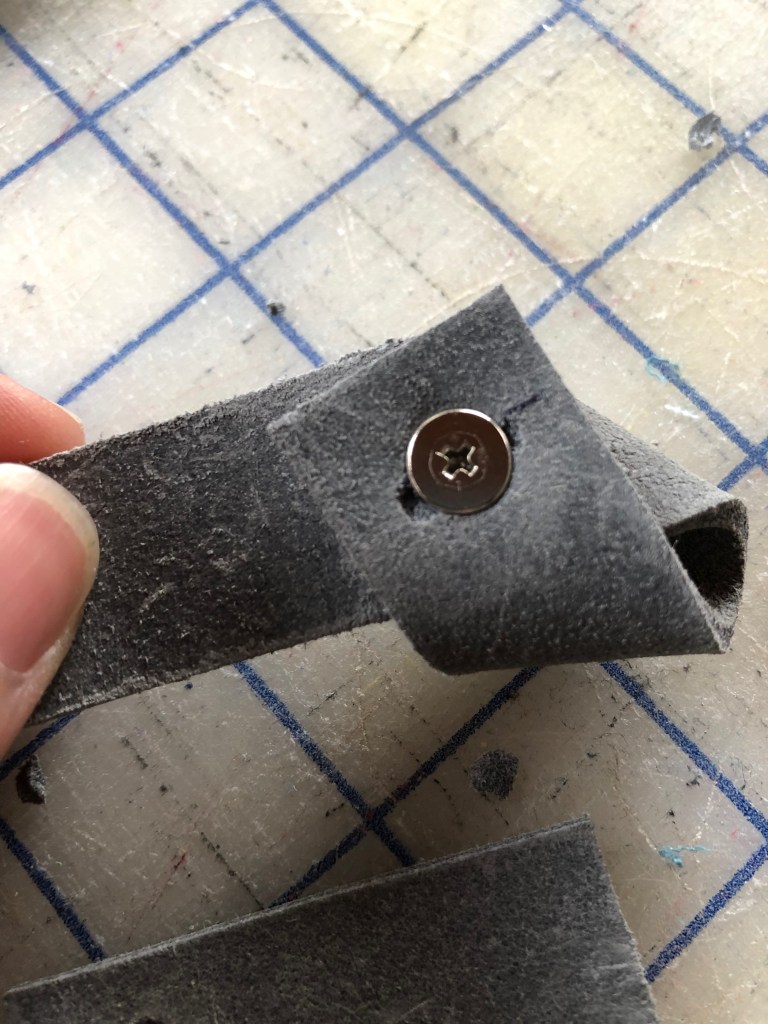
She also recommended using a drop of super glue (before placing the back of the stud in place) in the opening of the button stud to help secure the button “sandwich” in place.

Was there anything you disliked or would change? No, I love this kit and pattern combination. I adore the finished sandals and they are so special to me that I was able to make them (something I’ve never done before).
In addition to the recommended supply list, I also used an awl, super glue, and an Exacto knife. The leather punch that I had on hand wasn’t made very well. During the making of these sandals the punch became bent, with usage. I’m planning on getting rid of my current leather punch and replacing it with one that is of better quality to use in the future.
One extra tool that I used for this project is a clear ruler. It was very handy to use when cutting out the longer strap pieces at the beginning of the project.

Would you sew it again? Absolutely!

Would you recommend it to others? I would. I love that AHAPPYSTITCH also offers base kits. I could get alternate leathers to make more sandals in the future.

Do you consider the pattern beginner/intermediate/advanced? This pattern is all hand sewing (a sewing machine isn’t used for this project). I would say beginner! I had previously never hand sewn with leather or made sandals before.
Does the pattern include layers for easy printing?N/A. The cut out dimensions are included in the instructions.
Seam allowances used in the pattern:N/A
Is the pattern cut or no cut pages?N/A
I really like that the directions walk you through how to customize the fit of the sandals to your feet (trying them on as you are making them to move around the strap spacing).
Have you made this pattern before? Do you have other sandals that you have also enjoyed making? Thank you for reading this post.
