Hello! I’m very excited to share with you about making the Underwood Tank Dress! I made this pattern in the summer and I’m planning to live in this one (I love the finished garment). This is not a new pattern from Sew House 7, it’s been out for awhile.

Pattern Description:
The Underwood Tank is one of the easiest knitwear patterns you will ever sew and wear. It was designed with hot weather comfort in mind and is the ultimate warm weather travel piece. This style was meant to cover a wide spectrum of summer weather wardrobe needs – anywhere from a swim suit cover-up to an out-to-dinner dress.
All versions are sleeveless, fitted through the upper bust and then flowing into an A-line shape with a deep, curved back neckline that falls just above the bra-line for a little drama. The long (above the ankle) length dress also features long, knee-length side vents. There are three options for hem lengths, two options for front neckline depths, and two options for neck and armhole finishing.
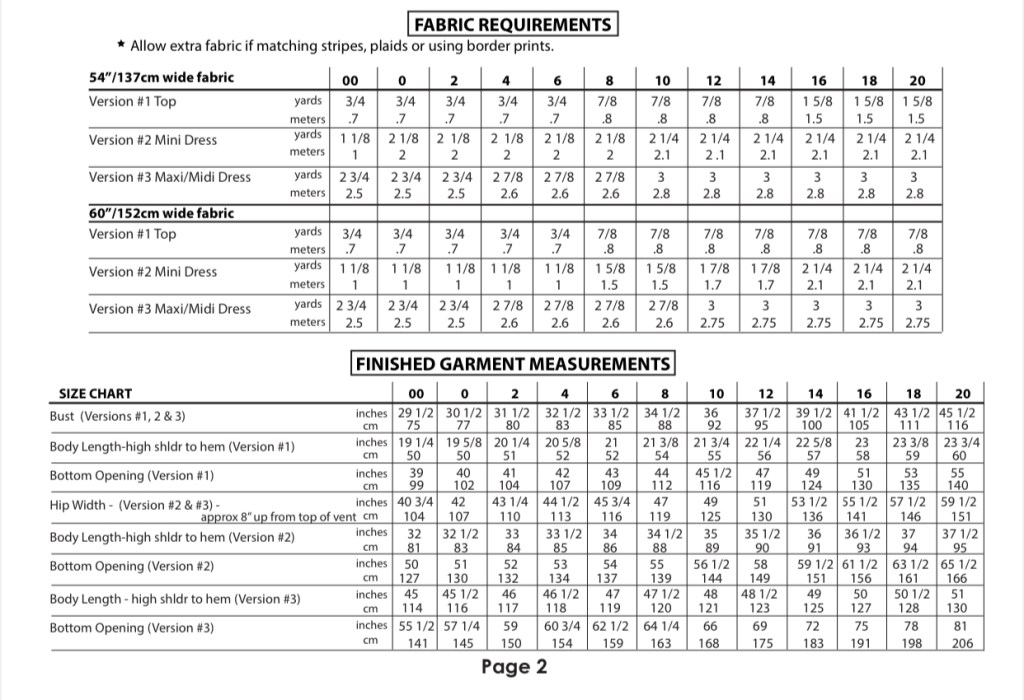
This pattern was fit using a bamboo/lycra jersey fabric. Most knit fabrics with at least 50 % stretch in the width and 20% in the length will work, however, be aware that more or less stretch may result in a smaller or larger fitting garment and you may need to size up or down.
Line drawings:

Pattern Sizing: Standard and Curvy.


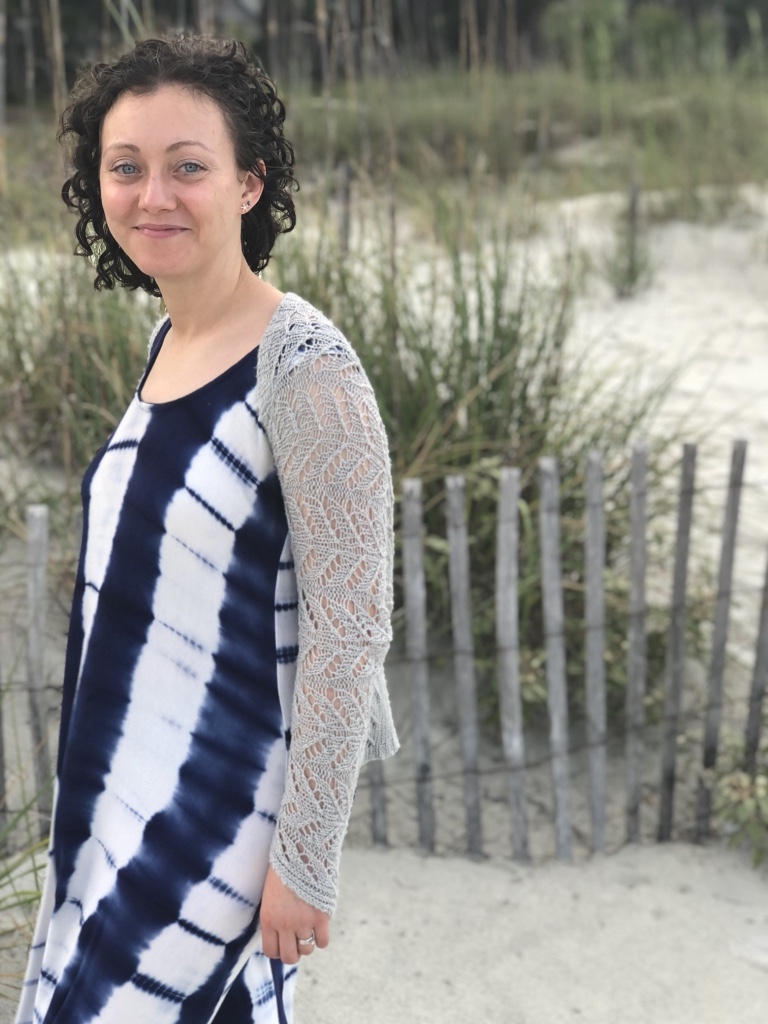
For my version I sewed a 6 at the shoulders and graded to a 10 under the arms (with a French Curve Ruler). I sewed the maxi length and selected neckline A (the higher front neckline).


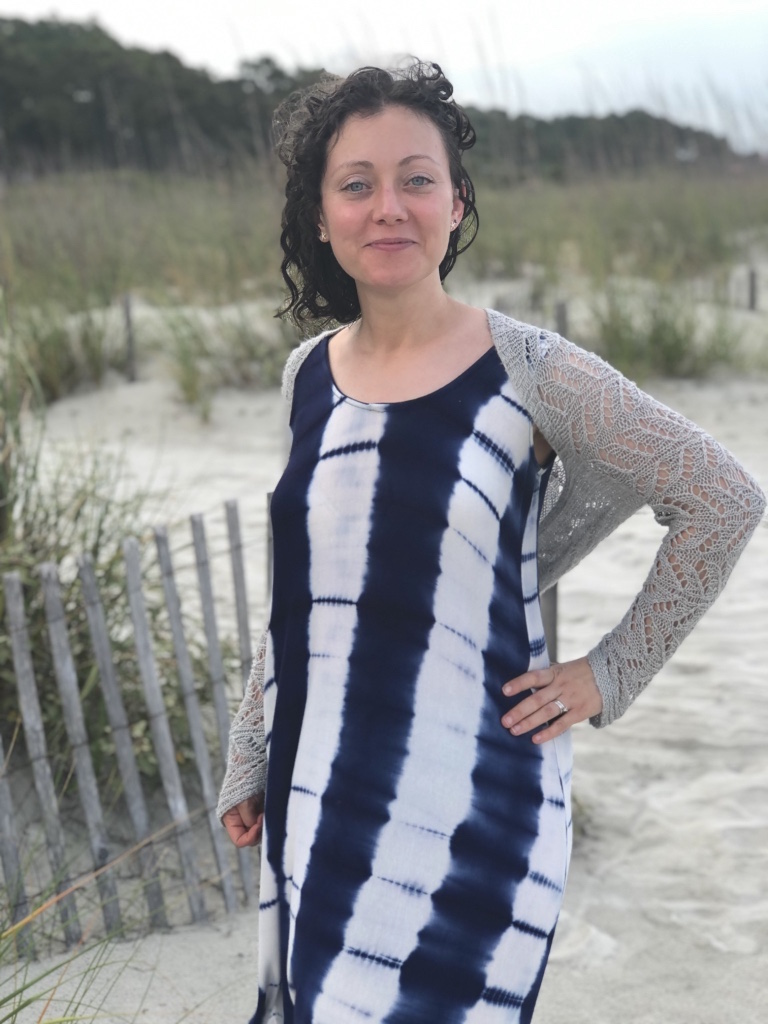
Did it look like the photo/drawing when you finished sewing? Yes!! With selecting neckline A (the higher neckline) and customizing the neckline facing, the dress that I made is comfortably reversible. I’ve enjoyed wearing the higher neckline to show off a necklace or the lower neckline in hotter temperatures.

We’re the instructions complete and easy to follow? Yes. Tips are included in the pattern for multiple ways to finish the neckline, armholes, etc.
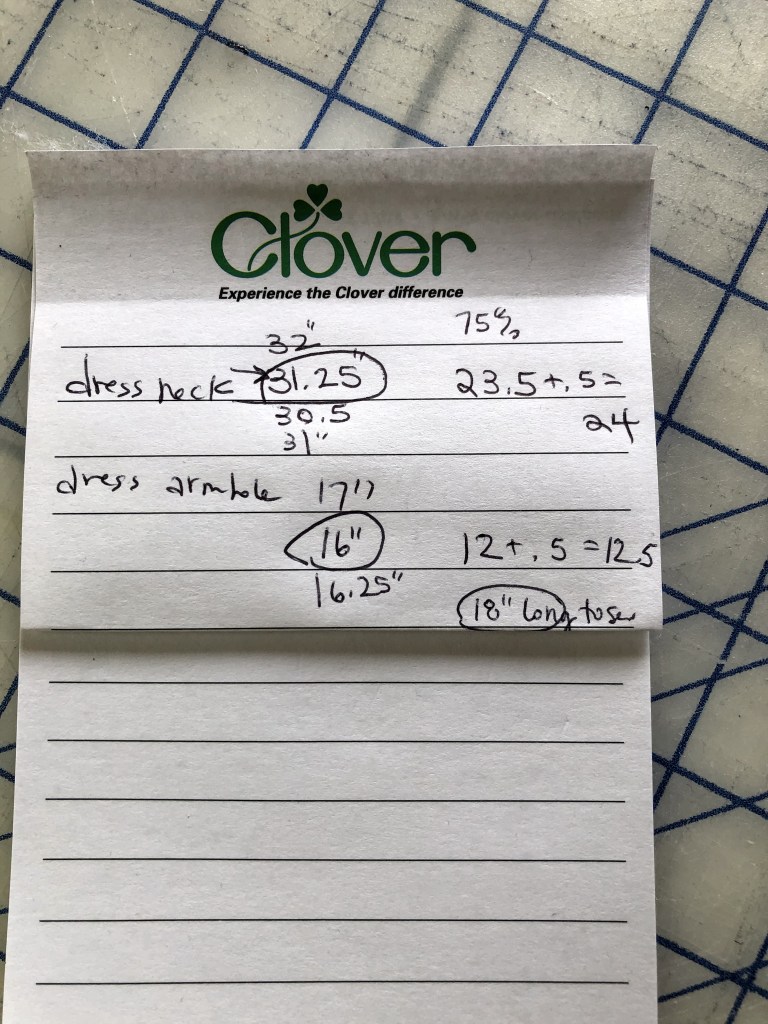
I went with a customized 25% reduced neckline and armhole facings. I use a cloth or plastic, flexile measuring tape. I carefully walk the measuring tape around the armhole (or neckline) and write down the measurement that I found. I typically repeat this process three or four times (or until I get the same measurement twice). There is lots of variation in this measuring process, so I keep taking this measurement until I get the same measurement twice. I note the final measurement and then multiple this measurement by 0.75. I then add 0.5″ for the seam allowance, 0.25″ for each end. For my dress, I cut a 24″ length for the neckline facing and 18″ lengths for the armhole facings. Every fabric is different so I recommend doing customized facings for your dress as well by taking your own measurements on your dress.
The following photo shows the armhole facings and neckline facing as cut out from the pattern piece. When I decided to customize the length, I knew I could reuse these pieces and cut off the lengths to make them 75% smaller.

Fabric used (did you use the suggested fabrics in the pattern)? I did, I used a rayon knit fabric in my stash. It was a little tricky to work with. There were white, Shibori style patterning in the fabric. The fabric was printed with the most amount of stretch with the white stripes running horizontally. As I layed out the fabric, I found the stripes were not going to run perfectly horizontal and were skewed a bit. There was enough vertical stretch in the fabric for me to flip the print and have the white stripes running vertically down the dress.
Did you alter the pattern in any way? Slightly. The instructions give multiple tips for ways to finish the armholes and neckline. Initially I used the pattern pieces to cut out the armhole and neckline facings. I tried on the dress before attaching the facings and I found with the large amount of stretch in this rayon knit fabric, the underarms were stretching below my bra and the back scoop of the dress was stretching below the back bra line.
I decided to layout the three facings at a 25% reduced length from the armholes/neckline. I might more commonly go with a 20%-15% reduced length but I wanted to bring up the fabric around the armholes and neckline in this case to compensate for the very stretchy fabric.

Was there anything you disliked or would change? No, I really love this pattern. I knew from sewing past dresses from Sew House 7 that I would love this one too!
Would you sew it again? I would although I think first I would enjoy sewing a tank.

Would you recommend it to others? Absolutely! It’s an easy pattern for beginners, very few actual pattern pieces, flattering on everyone and very comfortable to wea
Do you consider the pattern beginner/intermediate/advanced? A beginner that has been wanting to jump into knits!
Does the pattern include layers for easy printing? Yes
Seam allowances used in the pattern: 3/8″ included
Is the pattern cut or no cut pages? Cut pages
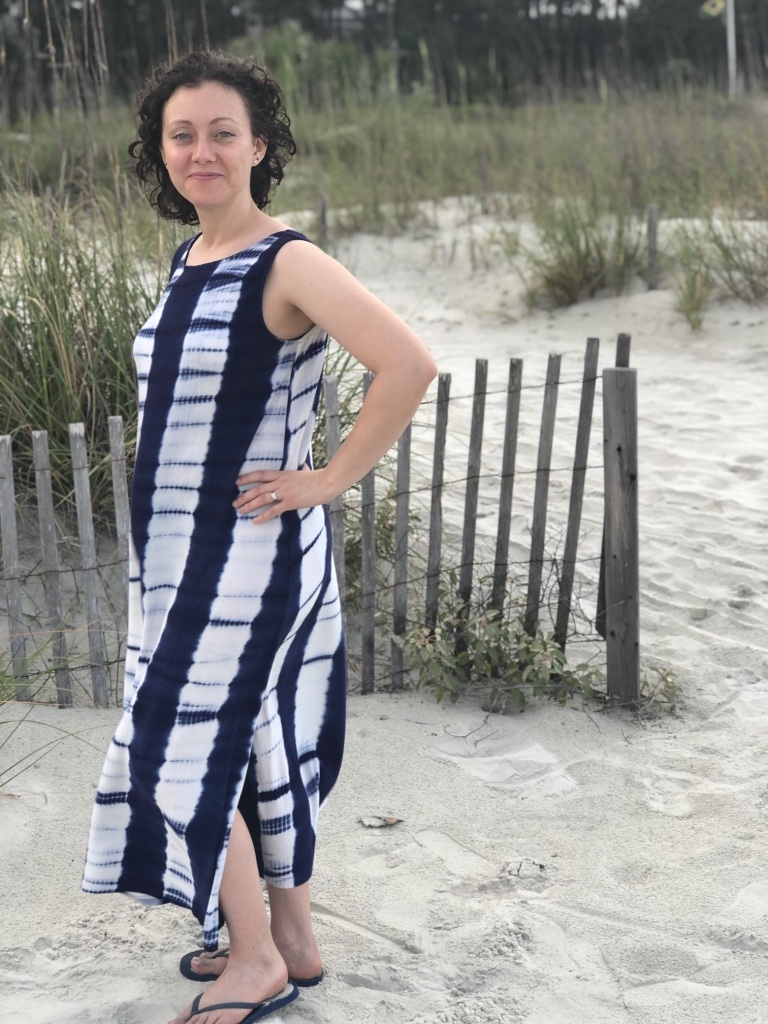
My only regret with the dress was not making it sooner. It’s such a comfortable dress to wear all summer. I need to make a few more as I’ve been wearing this one a lot. I highly recommend the maxi length with the side slits!!